
Showing posts with label paint. Show all posts
Showing posts with label paint. Show all posts
Sunday, 4 January 2015
Canvas
Here's a canvas I decorated, I had quite a few books for Christmas to take some inspiration from and so this is a bit of experimentation.
So basically there's a whole bunch of paint, gel medium, modelling paste, grunge paste, mod podge, collage, Dylusions, pebeo, stencilling, gilding wax, scratching and probably some things I've forgotten.....

Saturday, 27 September 2014
Better
Helllooo!
This time the Craft Barn words are patience or better. I found this funny rhyme about sneezes in a book of nursery rhymes that contains the word better.
I created the background with Dylusions, tar gel, texture paste, sparkle medium some through stencils, also various paints and also some distress inks. Then I randomly wrote on the rhyme with a Molotow pen.

This time the Craft Barn words are patience or better. I found this funny rhyme about sneezes in a book of nursery rhymes that contains the word better.
Sneeze on Monday, sneeze for danger;
Sneeze on Tuesday, kiss a stranger;
Sneeze on Wednesday, receive a letter;
Sneeze on Thursday, something better;
Sneeze on Friday, expect sorrow;
Sneeze on Saturday, joy to-morrow.
I created the background with Dylusions, tar gel, texture paste, sparkle medium some through stencils, also various paints and also some distress inks. Then I randomly wrote on the rhyme with a Molotow pen.
Tuesday, 5 August 2014
Boom!
Hello........
Here is a canvas I decorated at the weekend....just required some erm structural integrity work before it was finished!!
It started off as an experiment about texture, with some ideas I'd seen and the new texture mediums I'd got.
Basically the background is a whole sea of paint, paint mixed with gel medium, paint mixed with pumice medium, a piece of string dyed with ink and glued and painted down, tar gel medium mixed with primary elements, more paint, some archival ink, some tiny beads and that's about it I think.
I then decided to add the word boom in the foreground, for some bizarre reason I decided to make it from paper.....in hindsight not the best idea but I didn't really think it would work out but in the end it did work. So I drew the letters and then sprayed dylusions and used a paint marker round the edge of each letter. I cut it out and mod podge it all. Then I used two springs and used silicon glue to attach it to the canvas, but because it was paper it was all floppy so I had to add in some additional stilts; and a little remedial work with some gel medium to sort of strengthen it a little. Then I decided that was about as good as I was going to get it and so there you go......BOOM!!


Here is a canvas I decorated at the weekend....just required some erm structural integrity work before it was finished!!
It started off as an experiment about texture, with some ideas I'd seen and the new texture mediums I'd got.
Basically the background is a whole sea of paint, paint mixed with gel medium, paint mixed with pumice medium, a piece of string dyed with ink and glued and painted down, tar gel medium mixed with primary elements, more paint, some archival ink, some tiny beads and that's about it I think.
I then decided to add the word boom in the foreground, for some bizarre reason I decided to make it from paper.....in hindsight not the best idea but I didn't really think it would work out but in the end it did work. So I drew the letters and then sprayed dylusions and used a paint marker round the edge of each letter. I cut it out and mod podge it all. Then I used two springs and used silicon glue to attach it to the canvas, but because it was paper it was all floppy so I had to add in some additional stilts; and a little remedial work with some gel medium to sort of strengthen it a little. Then I decided that was about as good as I was going to get it and so there you go......BOOM!!
Friday, 22 November 2013
Christmas card
Yellooooooooooooooooo!
Here is another Christmas card I made....
An indigo blu stamp and some mega flakes.....on some coredinations cardstock....stuck down with some washi tape around the edge and then some gold gloss paint all around the edge and a craftwork cards greeting also covered with gold paint (maybe a bit too much gold hehe!!)

Here is another Christmas card I made....
An indigo blu stamp and some mega flakes.....on some coredinations cardstock....stuck down with some washi tape around the edge and then some gold gloss paint all around the edge and a craftwork cards greeting also covered with gold paint (maybe a bit too much gold hehe!!)

Sunday, 10 November 2013
The Magic of Christmas
Here is a little something I have made......I have entitled it the Magic of Christmas. I have wanted to create something like this for ages, I keep seeing things in magazines and on blogs and I really wanted to get a configurations box. Well I treated myself to a small one and here is a little box of Christmas joy that I created.
I started by painting the main box in a light green colour and then using flitter glu and gilding flakes around the edge. I got some Tim Holtz trees as well and I dyed this one green, I think this on was part distress stain and part Dylusions and then I added some glitter to the tree and the tiny piece of tinsel. I put cotton wool in one of the tiny bottles and sprinkled glitter on that as well, and I put little gold starts in the other bottle. I painted the two smaller boxes with gold gloss paint that I just got yesterday and already love, so it may now be used on everything hehe! Then I positioned the boxes in the larger box and stuck down the tree and then I added loads of glitters and stars and glitter glue. I also painted some glitter paint around the edge. I then found the star border that I had cut our on the cricut last year and never used, I painted that with glitter paint as well and added a few more stars and some glitter. Basically it was an excuse for me to cover everything in glitter:)


I started by painting the main box in a light green colour and then using flitter glu and gilding flakes around the edge. I got some Tim Holtz trees as well and I dyed this one green, I think this on was part distress stain and part Dylusions and then I added some glitter to the tree and the tiny piece of tinsel. I put cotton wool in one of the tiny bottles and sprinkled glitter on that as well, and I put little gold starts in the other bottle. I painted the two smaller boxes with gold gloss paint that I just got yesterday and already love, so it may now be used on everything hehe! Then I positioned the boxes in the larger box and stuck down the tree and then I added loads of glitters and stars and glitter glue. I also painted some glitter paint around the edge. I then found the star border that I had cut our on the cricut last year and never used, I painted that with glitter paint as well and added a few more stars and some glitter. Basically it was an excuse for me to cover everything in glitter:)


Sunday, 18 August 2013
Papier mache bird
Here's a little bird I made from papier mache......
I used wallpaper paste and newspaper for the base.....then once it was dry I painted it with gesso. Then I chose some acrylic paint colours and added a few layers until it was fully covered, and I used some black gems for the eyes. Oh and whilst I was making the initial bird I added in some wire legs that I just made really roughly by twisting round the wire.


I used wallpaper paste and newspaper for the base.....then once it was dry I painted it with gesso. Then I chose some acrylic paint colours and added a few layers until it was fully covered, and I used some black gems for the eyes. Oh and whilst I was making the initial bird I added in some wire legs that I just made really roughly by twisting round the wire.


Sunday, 30 June 2013
A couple of cards
Well I don't think I've already posted these two cards....so here goes....
For this one I made a Dylusions background tore it out into a rectangle and stamped on the stamps from the Tim Holtz tiny things set. I used some metallic paint to divide it into six and I wrote on happy birthday using a fine liner pen. I then stuck it on the card and used some black soot distress stain around the edge. Oh and I nearly forgot I added some frantage embossing powders as well.

On this next one I used a new stencil/mask/template whatever you want to call it, I dyed some texture paste with Dylusions I think it must have been the turquoise one and then used a sponge brush to apply it to the template, then once dry I used some Peacock feathers around the edge, basically I have a square of cut and dry foam with peacock feathers on it and I just keep grabbing it to use as it's next to me, so at the moment peacock feathers is ending up on everything almost!! I tore it out and stuck it on the card and I think it must have been walnut stain around the edge. I cut out a piece of adhesive ribbon and stuck that down and then I added a Craftwork cards greeting and a couple of pearls.

For this one I made a Dylusions background tore it out into a rectangle and stamped on the stamps from the Tim Holtz tiny things set. I used some metallic paint to divide it into six and I wrote on happy birthday using a fine liner pen. I then stuck it on the card and used some black soot distress stain around the edge. Oh and I nearly forgot I added some frantage embossing powders as well.

On this next one I used a new stencil/mask/template whatever you want to call it, I dyed some texture paste with Dylusions I think it must have been the turquoise one and then used a sponge brush to apply it to the template, then once dry I used some Peacock feathers around the edge, basically I have a square of cut and dry foam with peacock feathers on it and I just keep grabbing it to use as it's next to me, so at the moment peacock feathers is ending up on everything almost!! I tore it out and stuck it on the card and I think it must have been walnut stain around the edge. I cut out a piece of adhesive ribbon and stuck that down and then I added a Craftwork cards greeting and a couple of pearls.

Sunday, 2 June 2013
Little canvas
I made a little present for Lee.....again I used the Spotz Botz set to stamp out a robot on to a Dylusions, perfect pearls and swirly paint background and then I cut out the image and used a fine liner to fill in any parts I hadn't quite cut properly.
On the canvas itself I used a stencil and some texture paste which got slightly blue when it mixed with some ink on my craft mat, I left that to dry and then I sprayed on some more Dylusions, and I painted over the 3D area Paper Artsy metallic glaze which gives a lovely shiny effect that you can't really see in the photo. I glued on some micro beads and added a touch more ink around the edge. Although it didn't really want to dry properly probably because I'd made the surface shiny from the glaze so I probably should have used Staz on rather than distress but I've left it as it was for now.
Finally I drew on a few lines for the ground and then glued on the robot to make the finished piece.


On the canvas itself I used a stencil and some texture paste which got slightly blue when it mixed with some ink on my craft mat, I left that to dry and then I sprayed on some more Dylusions, and I painted over the 3D area Paper Artsy metallic glaze which gives a lovely shiny effect that you can't really see in the photo. I glued on some micro beads and added a touch more ink around the edge. Although it didn't really want to dry properly probably because I'd made the surface shiny from the glaze so I probably should have used Staz on rather than distress but I've left it as it was for now.
Finally I drew on a few lines for the ground and then glued on the robot to make the finished piece.


Saturday, 20 April 2013
Walking around in Circles
Hellloooooooooo!
Craft barn challenge time again....actually I'm a week behind.....but that's why it's a good job there's two weeks for each letter, anyway this time it is W and you have to use circles on the background. So I was thinking Weather but when I checked my dictionary I had previously torn that page out for another project. Then my mom text me and suggested walking because I do a lot of it - and so I picked walk out of the dictionary. Even better I could link in the circles with the phrase "Walking around in circles".
So this time I used Paper Artsy Fresco finish paints - I forget the actual colour names but a light pink and lilac - then I used a scrap bit of card that I'd previously been messing about with stencils and inks on and punched out the circles - I glued them down with sparkle mod podge - which has got glitter in it. Then I drew on the little stick people and stamped the signpost which is from one the Hobby Art scene it sets. Then I used purple archival to stamp the dots (Tim Holtz Ultimate Grunge) and and added some purple glitter. The I used black gesso and a lid to stamp some more circles; and I went around the edge with some walnut stain and dusty concord distress inks. Oh I also drew on some circles as well with a purple fine liner.
Here's the link - letter W


Craft barn challenge time again....actually I'm a week behind.....but that's why it's a good job there's two weeks for each letter, anyway this time it is W and you have to use circles on the background. So I was thinking Weather but when I checked my dictionary I had previously torn that page out for another project. Then my mom text me and suggested walking because I do a lot of it - and so I picked walk out of the dictionary. Even better I could link in the circles with the phrase "Walking around in circles".
So this time I used Paper Artsy Fresco finish paints - I forget the actual colour names but a light pink and lilac - then I used a scrap bit of card that I'd previously been messing about with stencils and inks on and punched out the circles - I glued them down with sparkle mod podge - which has got glitter in it. Then I drew on the little stick people and stamped the signpost which is from one the Hobby Art scene it sets. Then I used purple archival to stamp the dots (Tim Holtz Ultimate Grunge) and and added some purple glitter. The I used black gesso and a lid to stamp some more circles; and I went around the edge with some walnut stain and dusty concord distress inks. Oh I also drew on some circles as well with a purple fine liner.


Sunday, 10 March 2013
Cards and things...
Here are some cards I've made including this year's Mother's Day cards....
 This one was drawn Zentangle style cut out and layered on some card and a little bit of washi tape in the background
 This one again the centre is Zentangle inspired with repeated daffodils and then the background is some texture paste through a flower stencil and then sprayed with Dylusions and then I stuck some flowers on the top
 This is a stamp I got last week from Papermania......I just stamped and coloured it with Promarkers and added the greeting and a little distress around the edges oh and a little bit of glitter to finish
 This was a background made using Dylusions and stencils and I then tore it out using a ruler for a straighter edge and then walnut stain around the edge and another set of new stamps these ones from Indigo Blu and then in the far background I stamped grass and flowers I think from a Paper Artsy set and then on the inside I stamped another flower from the same Paper Artsy set and coloured with Distress inks
 I also had a go at making some chocolates for my mom and here are some of the results.....I just melted various chocolate bars and put them in silicon moulds and added a few bits and pieces like choc chips and fudge sauce and then once set I added a few decorations......silver shimmer, gold stars, metallic paint...all edible of course!
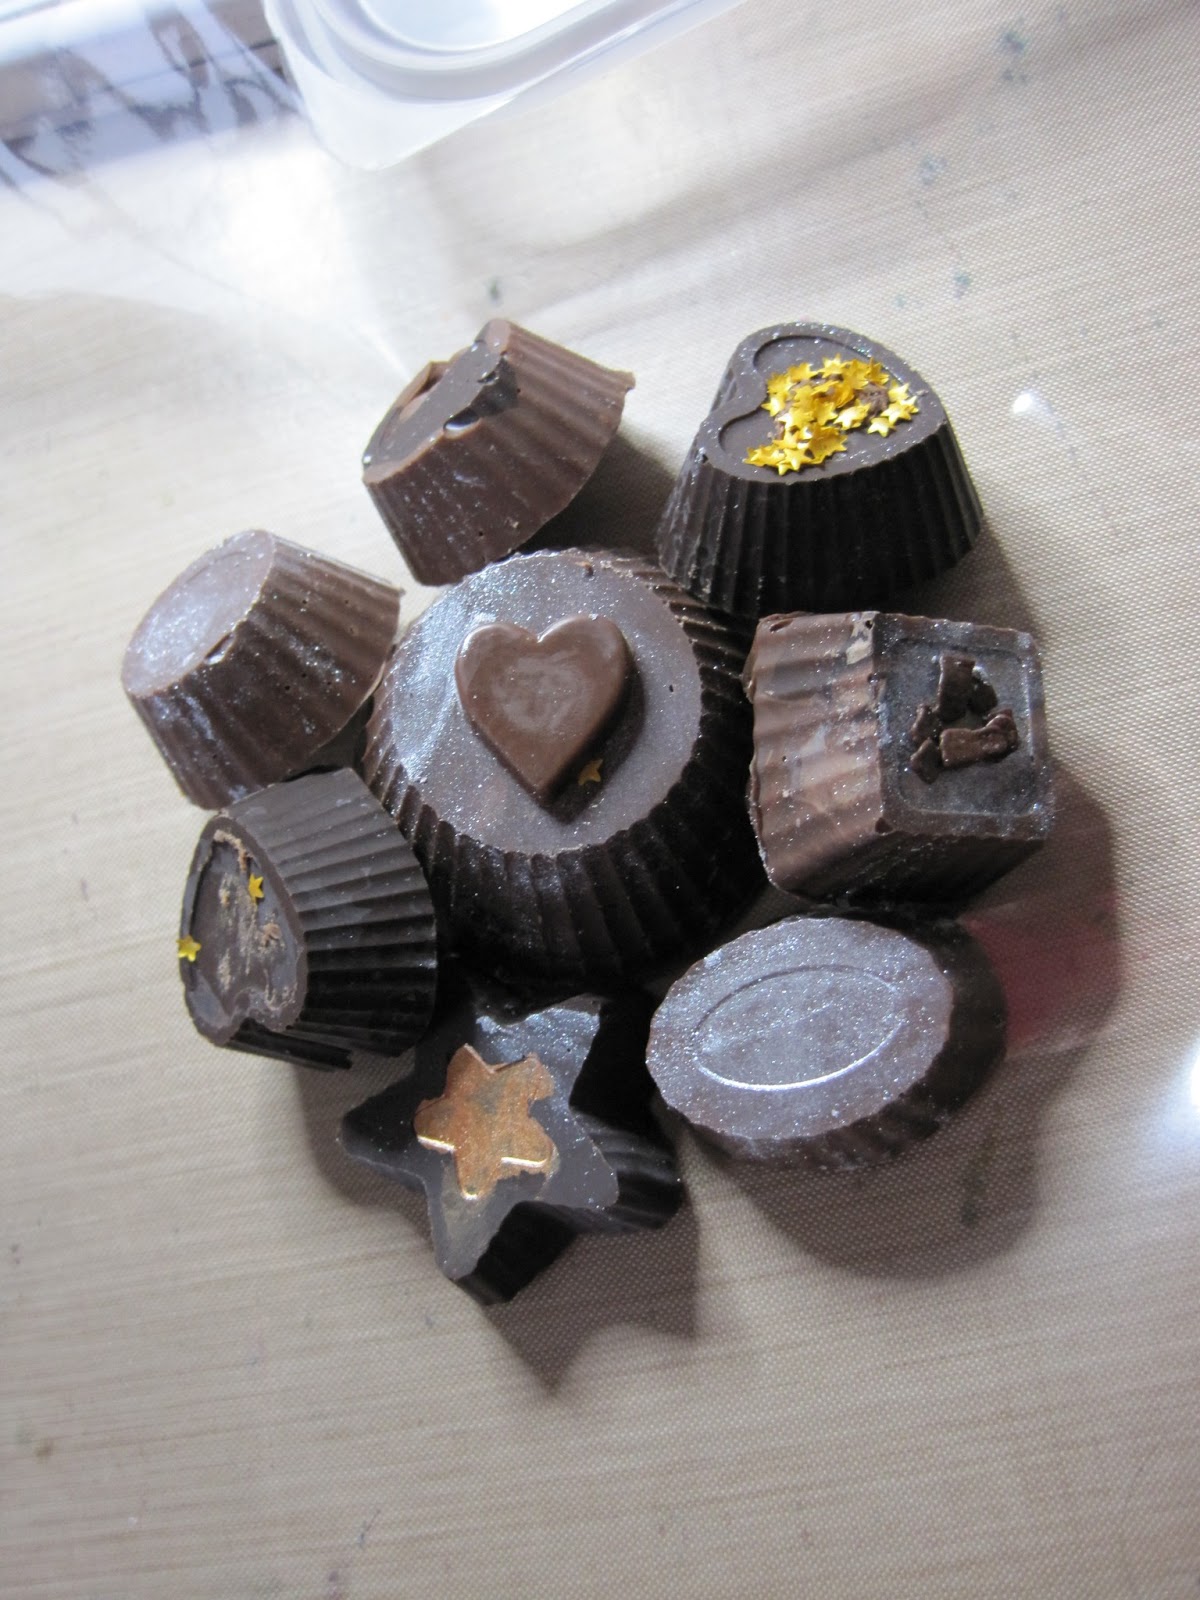
 And I decorated this little basket to put them in......a layer of gesso followed by some Paper Artsy fresco paint in pink some washi tape around the handle, a little bit of ribbon and some pink tissue paper.....
Sunday, 20 January 2013
Say Cheeeeeeeeeeese!!
Here is my entry for the Craft Barn's Alpha Challenge - I couldn't wait to see what the letter was this week.....oooh C - a lot of choice but I settled on Cheese!!
Here is the link: http://thecraftbarnblog.blogspot.co.uk/2013/01/alpha-challenge-letter-c.html
I thought hmm what shall I do with cheese and I thought I am sure I cut out a mouse ages ago and never used it for anything......so the mouse was cut out on the Cricut and I stuck on googly eyes and then I hand cut the cheese out of some yellow card and hole punched it. For the background I painted the page white and then went round the edge with Paper Artsy light blue colour. I stuck on the mouse and the cheese....and then flicked some blue ink over and drew on some cheesy grins and then stamped the letter C in blue archival. Then I couldn't finish of course without edging in walnut stain distress ink.

 Also thanks for those tips on using a glass plate to take photos......luckily I have a boyfriend who takes things apart and when I asked him he came up with the glass plate from an old scanner which was perfect!
Here is the link: http://thecraftbarnblog.blogspot.co.uk/2013/01/alpha-challenge-letter-c.html
I thought hmm what shall I do with cheese and I thought I am sure I cut out a mouse ages ago and never used it for anything......so the mouse was cut out on the Cricut and I stuck on googly eyes and then I hand cut the cheese out of some yellow card and hole punched it. For the background I painted the page white and then went round the edge with Paper Artsy light blue colour. I stuck on the mouse and the cheese....and then flicked some blue ink over and drew on some cheesy grins and then stamped the letter C in blue archival. Then I couldn't finish of course without edging in walnut stain distress ink.


Friday, 18 January 2013
Picnic anyone?
I had a silicon mould of fruit for Christmas to use with UTEE.....and here are my first results......a UTEE still life.....sort of!! The background is distress stains and the table cloth is painted.....the basket is made from grunge paper painted with brown paint and distress stains. I added some glitter and perfect pearls to the moulds to make the fruit sparkly.....my favourite are the bananas!


Sunday, 13 January 2013
Oxygen and Fluorine
Here are the next two elements......a pinky purple theme for these two.......and if I've learnt nothing else I now know you spell Fluorine uo and not ou...!
The backgrounds are a variety of all sorts of paints and inks and stencils and glitter.......Oxygen was initially embossing ink used through stencils and then I used pastels to adhere to the embossing ink then I went over the top with various inks and paints......I think the pink must be Dylusions but I can't remember!! Fluorine has got some extra purple paint and I used my square grid stencil on that one and I went round the edge with black soot distress stain.


The backgrounds are a variety of all sorts of paints and inks and stencils and glitter.......Oxygen was initially embossing ink used through stencils and then I used pastels to adhere to the embossing ink then I went over the top with various inks and paints......I think the pink must be Dylusions but I can't remember!! Fluorine has got some extra purple paint and I used my square grid stencil on that one and I went round the edge with black soot distress stain.


Friday, 28 December 2012
Christmas things...
Here are some things I can post now Christmas is over.
I painted and decorated the Noel frame (Paper Artsy fresco paints are lovely!) and some tiny little bells that I've been wanting a use for since I got them....
 And I made an album for my sister and brother in law......based on Centerparcs! Here are some of the pages....I made the backgrounds with a variety of inks and paints in a green/brown theme and then I chose a theme for each page and cut out the photos and added some words etc.


I painted and decorated the Noel frame (Paper Artsy fresco paints are lovely!) and some tiny little bells that I've been wanting a use for since I got them....


Sunday, 9 December 2012
Christmas cards.....


I bought some pre cut out trees and used them here. Coloured with silver paint, a kind of brass type paint that I swooshed a bit to get a pattern and then crackle paint. Background paper is Graphic 45 again and the greeting is from Craftwork cards.
This one is a lamp post stamp from Tim Holtz SA and the houses are from the Hobby Art scene it coastal set. Made them look snowy with paint and gesso and used a bit of picket fence distress stain and some more paint for the snow on the ground. Stamped the hero arts greeting with gold paint and put some glitter round the edge....
Saturday, 3 November 2012
Carbon
Here is Carbon.....which is actually a double spread with Nitrogen but I haven't quite finished Nitrogen yet. It was all Dyan Reavely inspired as I was watching a video demo of her ghosting technique.......and now I've gone all ink and stencil crazy hehehehe!!
Also used a couple of Tim Holtz stamps and a splurge of paint around and about......

Also used a couple of Tim Holtz stamps and a splurge of paint around and about......

Saturday, 27 October 2012
New things....
We went to the craft show at Kettering the other week, which means new goodies!! Here is a card I made......using a Paper Artsy stamp on a painted background - using Paper Artsy paints which I really like and will have to get some more of! I highlighted a few areas with distress inks.....then just made an inky background on the card....and I think I used metallic glaze too which is actually more silvery than it looks in the photo. Then embellished with a greeting and flower......
I'm working on something else too but I can't post it just in case prying eyes should see hehe!! Actually I've got a few things like that at the moment......
And I've done the next few pages of my elements.....but I just need to finish off Nitrogen and then I will have to post them......

I'm working on something else too but I can't post it just in case prying eyes should see hehe!! Actually I've got a few things like that at the moment......
And I've done the next few pages of my elements.....but I just need to finish off Nitrogen and then I will have to post them......

Sunday, 16 September 2012
Lithium

Saturday, 8 September 2012


I absolutely love learning stuff......and I love creating stuff so I am mixing the two......here are a couple of pages I've made about Hydrogen and Helium.......and hopefully the theme will continue.....although I'm always easily distracted by about a billion others things so who knows.........
The background on Hydrogen is pastel and then I printed and cut out Henry Cavendish and coloured him a little with Promarkers and then wrote on the facts with some pens I had years ago and the yellow symbol was cut out from an old periodic table that we had on the wall but kept falling off and basically that was what inspired the idea in the first place.......and the brown specks are a stamp
Then the other page is a background of distress stains and distress ink and then purple Dylusions.....I can't wait to get some more Dylusions inks as I've only got purple at the moment and I love how messy they are......then I wrote on the facts and I went over the top of the cut out symbol with sparkle mod podge and then I stamped some lids etc with black gesso then I dulled that back down by going over the top with yellow pastel.....and I coloured in the big helium letters with silver Promarker.......

Subscribe to:
Posts (Atom)